Nextcloud and OpenID-Connect
This is a updated version of a old blog post from 2020. The guide here was tested with Nextcloud Hub 5 and Keycloak 21.1.2.
Please keep in mind, the main goal of this article is to get Keycloak up and running quickly to test the Nextcloud OIDC connector. It is not a detailed guide how to setup Keycloak for production! It is quite likely that I missed some important security setting which you would like to enable for a live system.
Get a OpenID Connect provider
First step was to get an OpenID-Connect provider, sure I could have chosen one of the public services. But why not have a small nice provider running directly on my machine? Keycloak makes this really simple. By following their Getting Started Guide I could setup a OpenID-Connect provider in just a few minutes and run it directly on my local demo machine. I will show you how I configured Keycloak as an OpenID-Connect provider for Nextcloud.
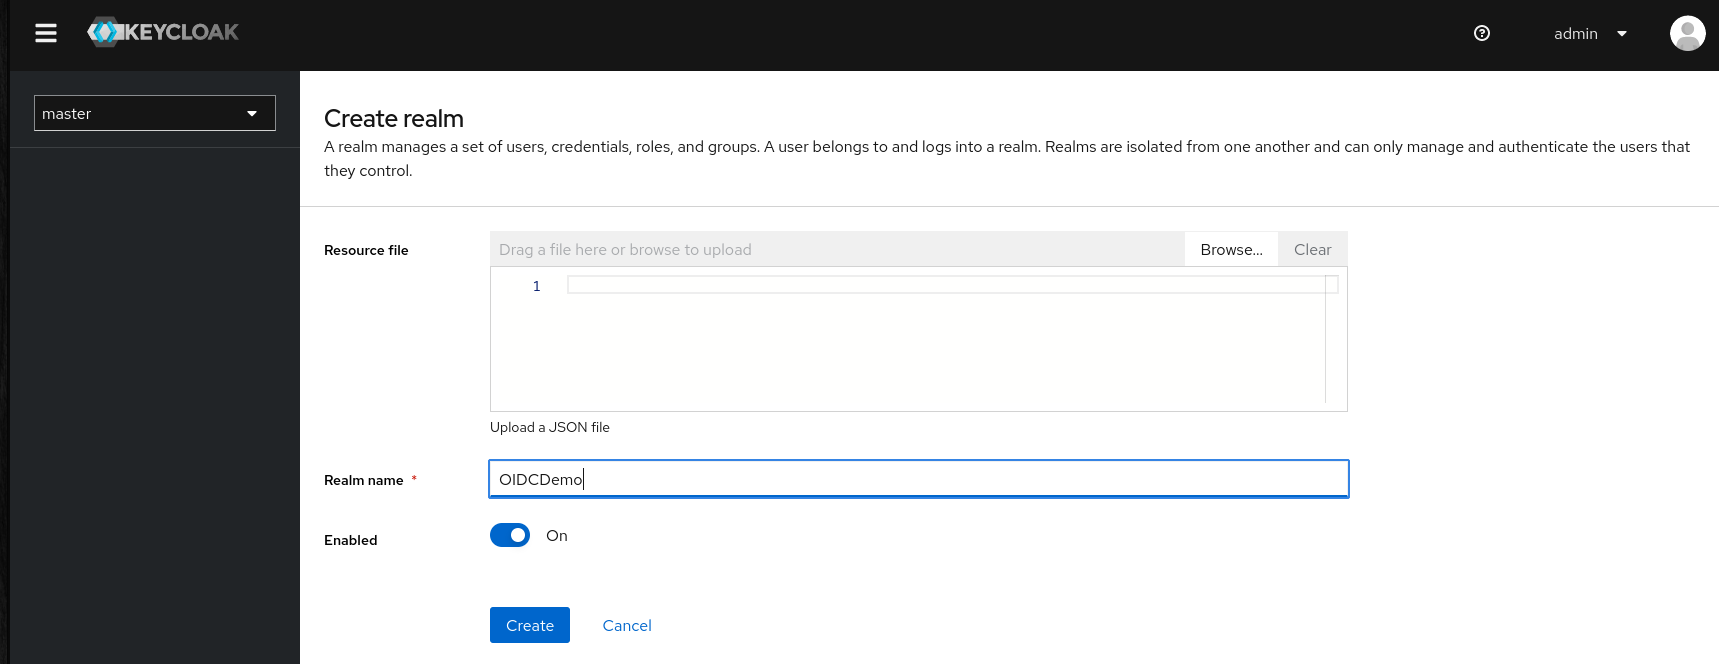
After installing Keycloak we go to http://localhost:8080/admin which is the default URL in “standalone” mode and login as admin. The first thing we do is to configure a new Realm in the “Realm Settings”. We only set a Realm name, no “resource file” needed:
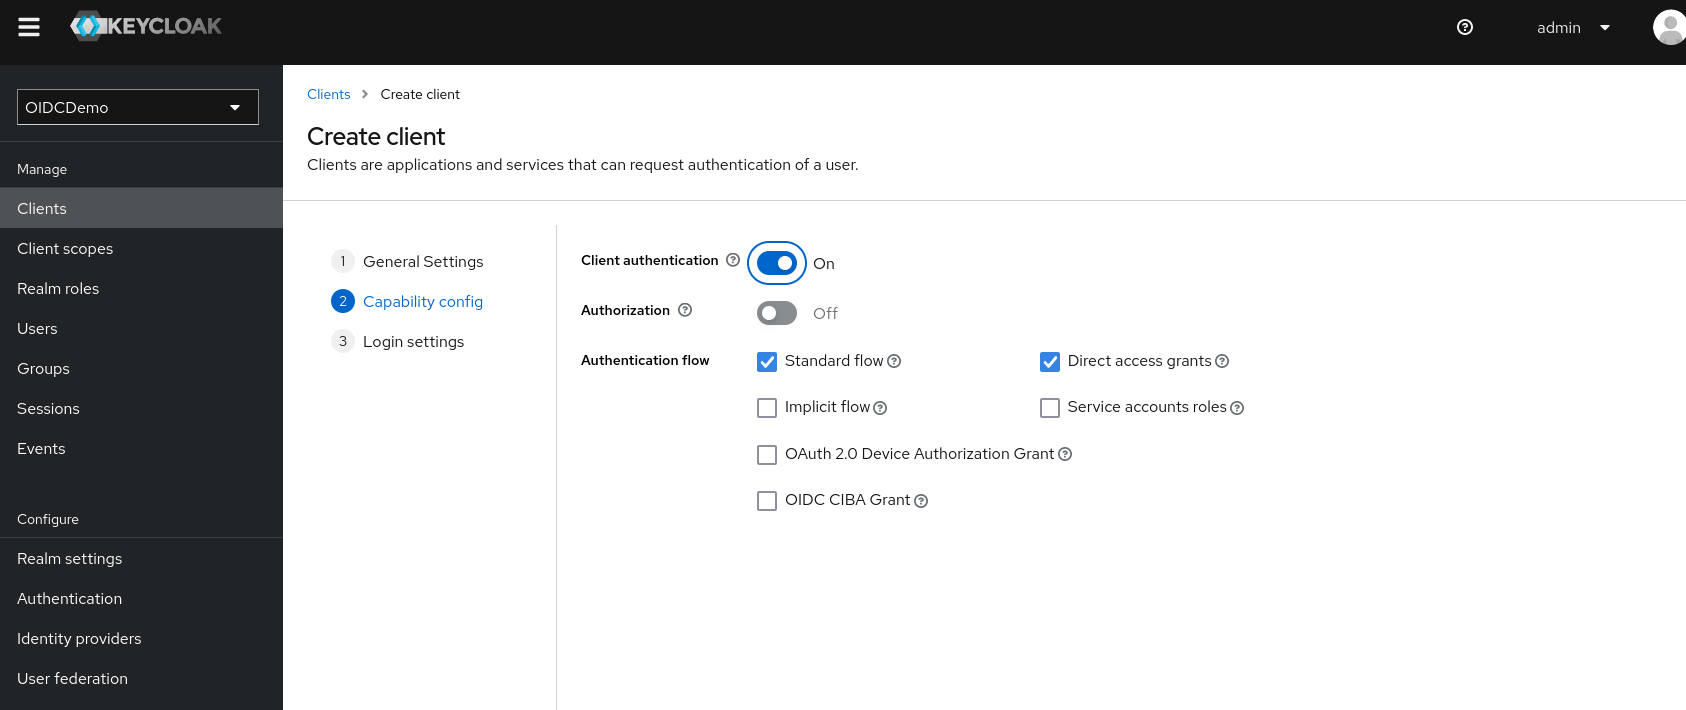
Next we move on to the “Clients” tab, and created a new client. In the dialog we first set a random “Client ID”, I have chosen “nextcloud” in this example.

On the second page we enable “Client authentication”
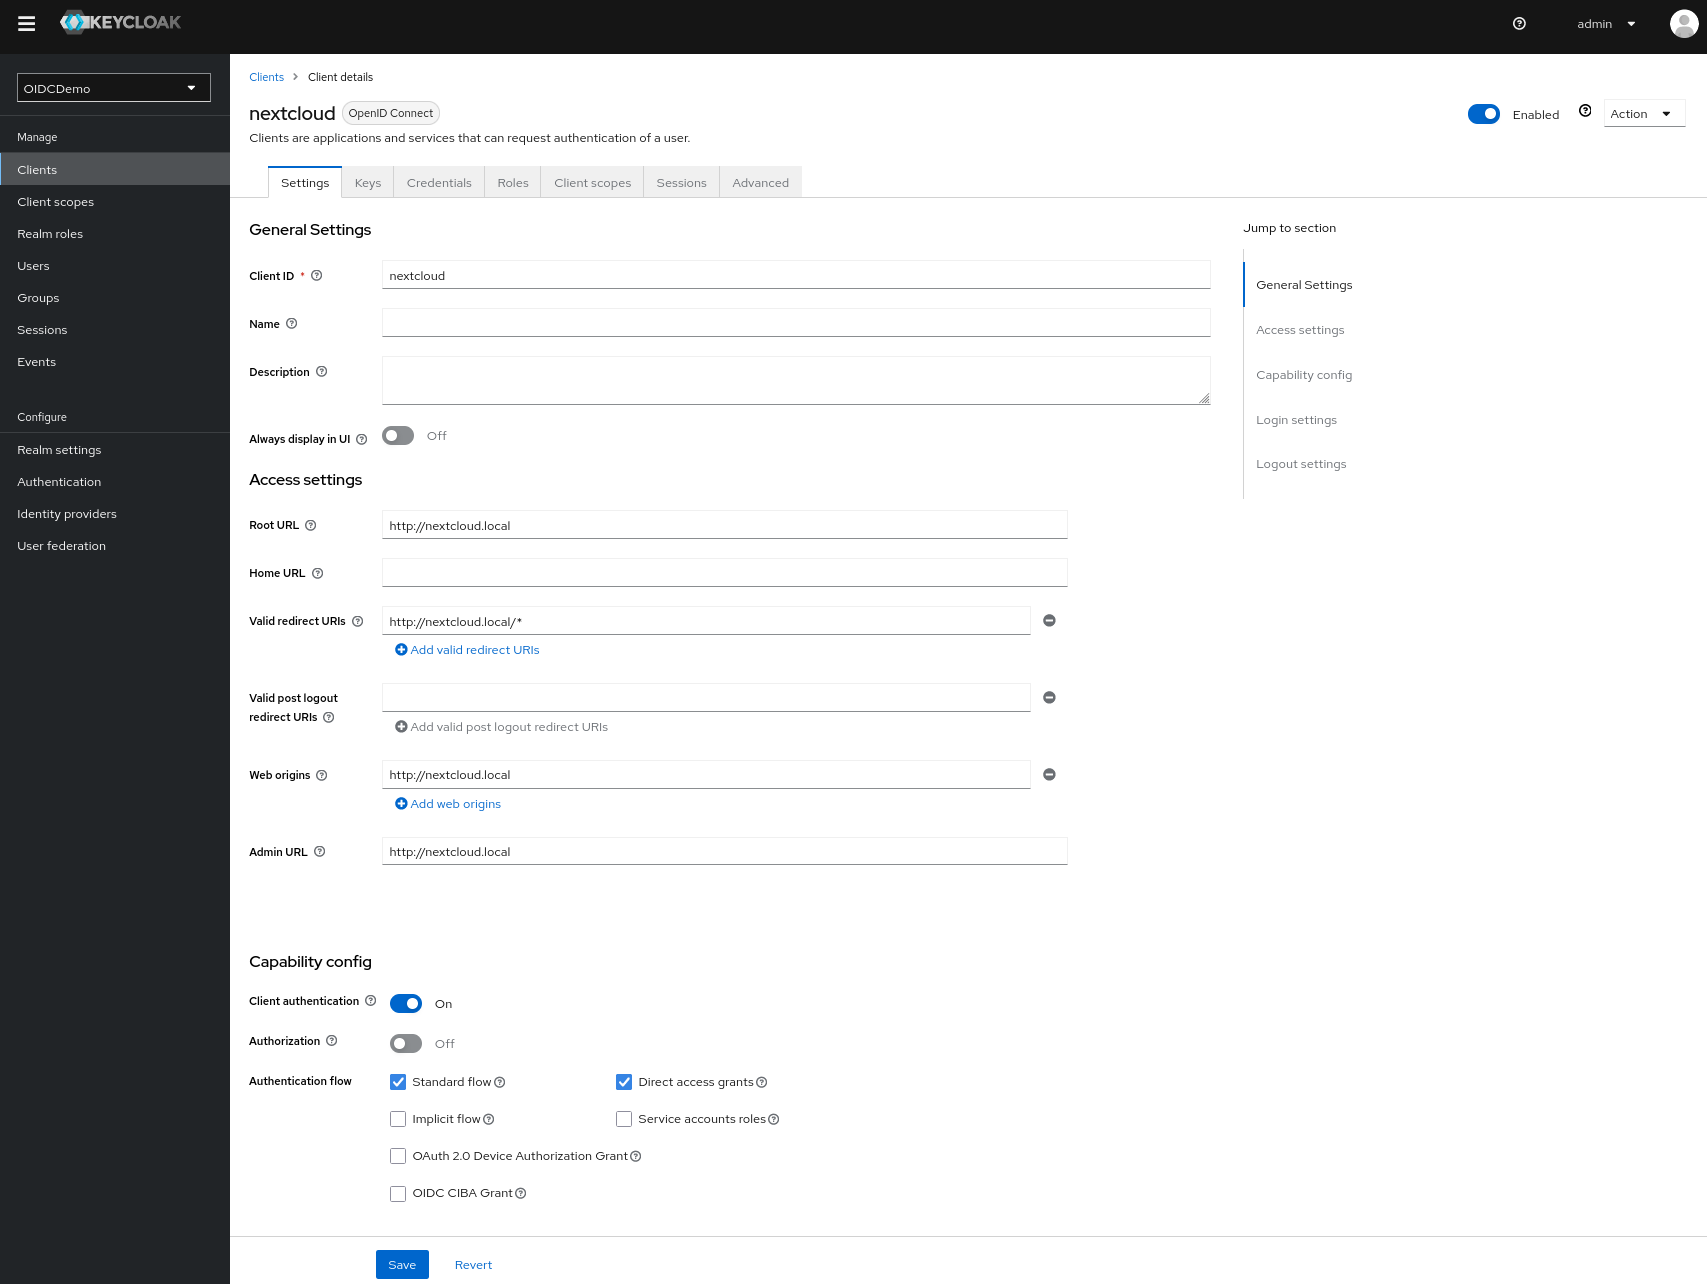
and on the last page we set the “Root URL” to the Nextcloud, in this case “http://nextcloud.local”.

All other settings are already set correctly, this is now the final client setting looks like:
Finally we create a user who should be able to login to Nextcloud later.

While technically the “Username” is enough I directly set email address, first- and second name. Nextcloud will reuse this information later to pre-fill the users profile nicely. Don’t forget to go to the “Credentials” tab and set a password for your new user.
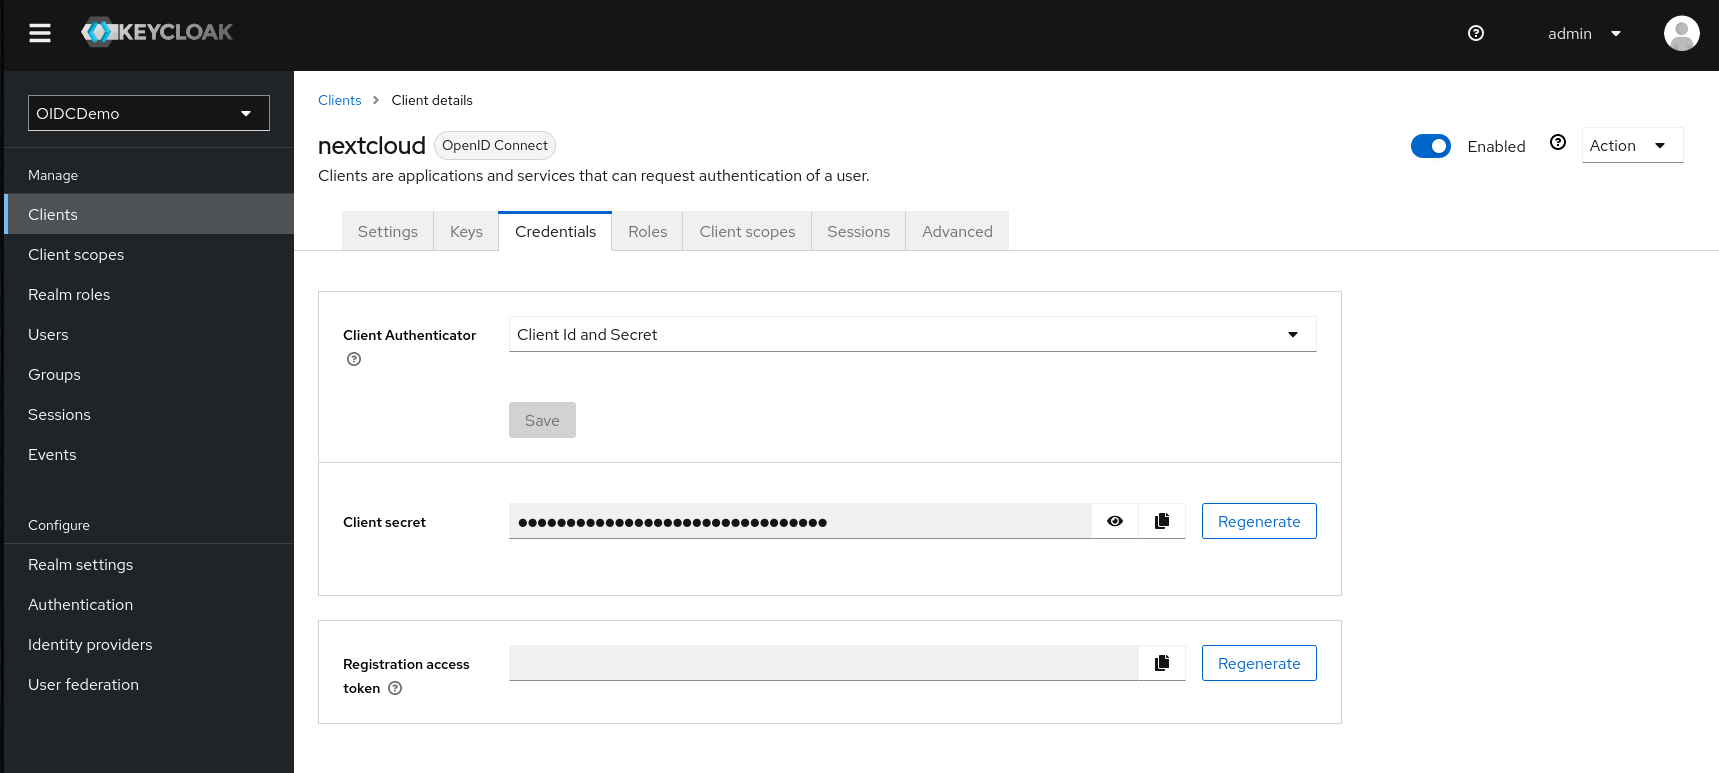
That’s it, now we just need to get the client secret fot the final Nextcloud configuration. We can find this in the credential tab of the “nextcloud” client settings:
Nextcloud setup
Before we continue, make sure to have the following two lines in your config.php:
'allow_local_remote_servers' => true,
'debug' => true,
Otherwise Nextcloud will refuse to connect to Keycloak on localhost through a unsecure connection (http).
Now we can move on and configure Nextcloud. If you go to the Nextcloud apps management and search for “openid” you will not only find the official app but also the community apps. Make sure to chose the app called “OpenID Connect user backend”. Just to avoid misunderstandings at this point, the Nextcloud community does an awesome job! I’m sure the community apps work great too, they may have even more features compared to the official app. But the goal of this article was to try out the officially supported OpenID-Connect app.
After installing the app we go to the admin settings where we will find a new menu entry called “OpenID Connect” on the left sidebar and register a new provider:
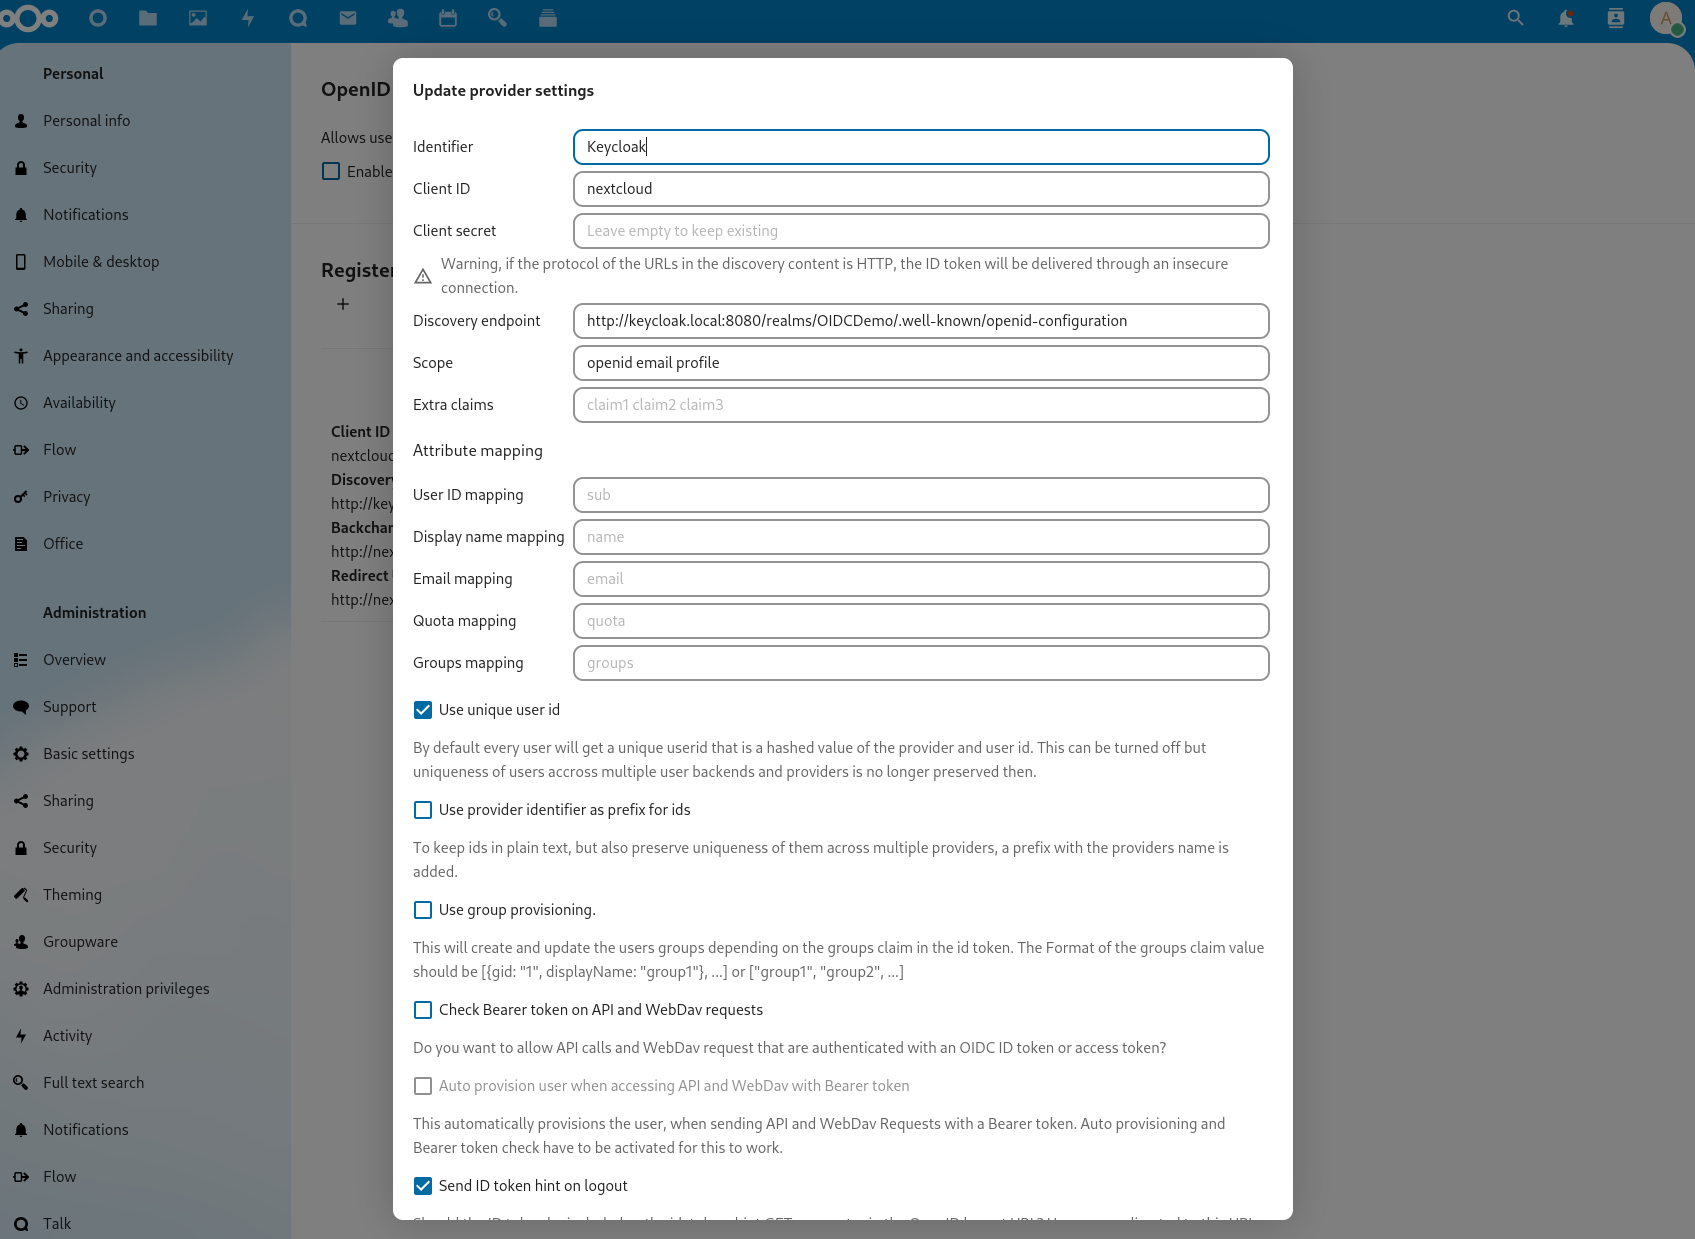
The app supports multiple OpenID Connect providers in parallel, so the first thing we do is to chose a “Identifier” which will be shown on the login page to let the user chose the right provider. For the other fields we enter the “Client ID”, “Client secret” and “Discovery endpoint” from Keycloak. The discovery endpoint looks like the following: http://<your-keycloak-base-url>/realms/<REALM-NAME>/.well-known/openid-configuration. As you can see there are many more configuration parameters, for example a custom attribute mapping. But for the base installation we are complete.
Now let’s try to login with OpenID Connect:

As you can see, we have now an additional button called “Login with Keycloak”. Once clicked we get redirected to Keycloak:
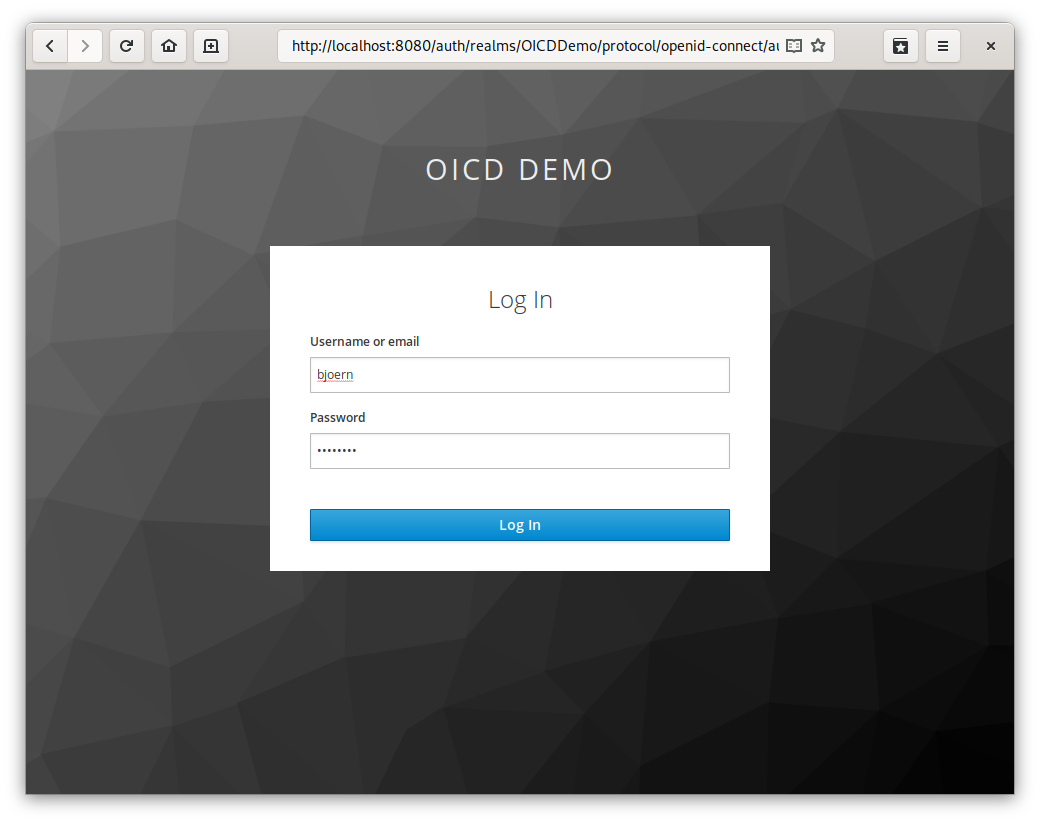
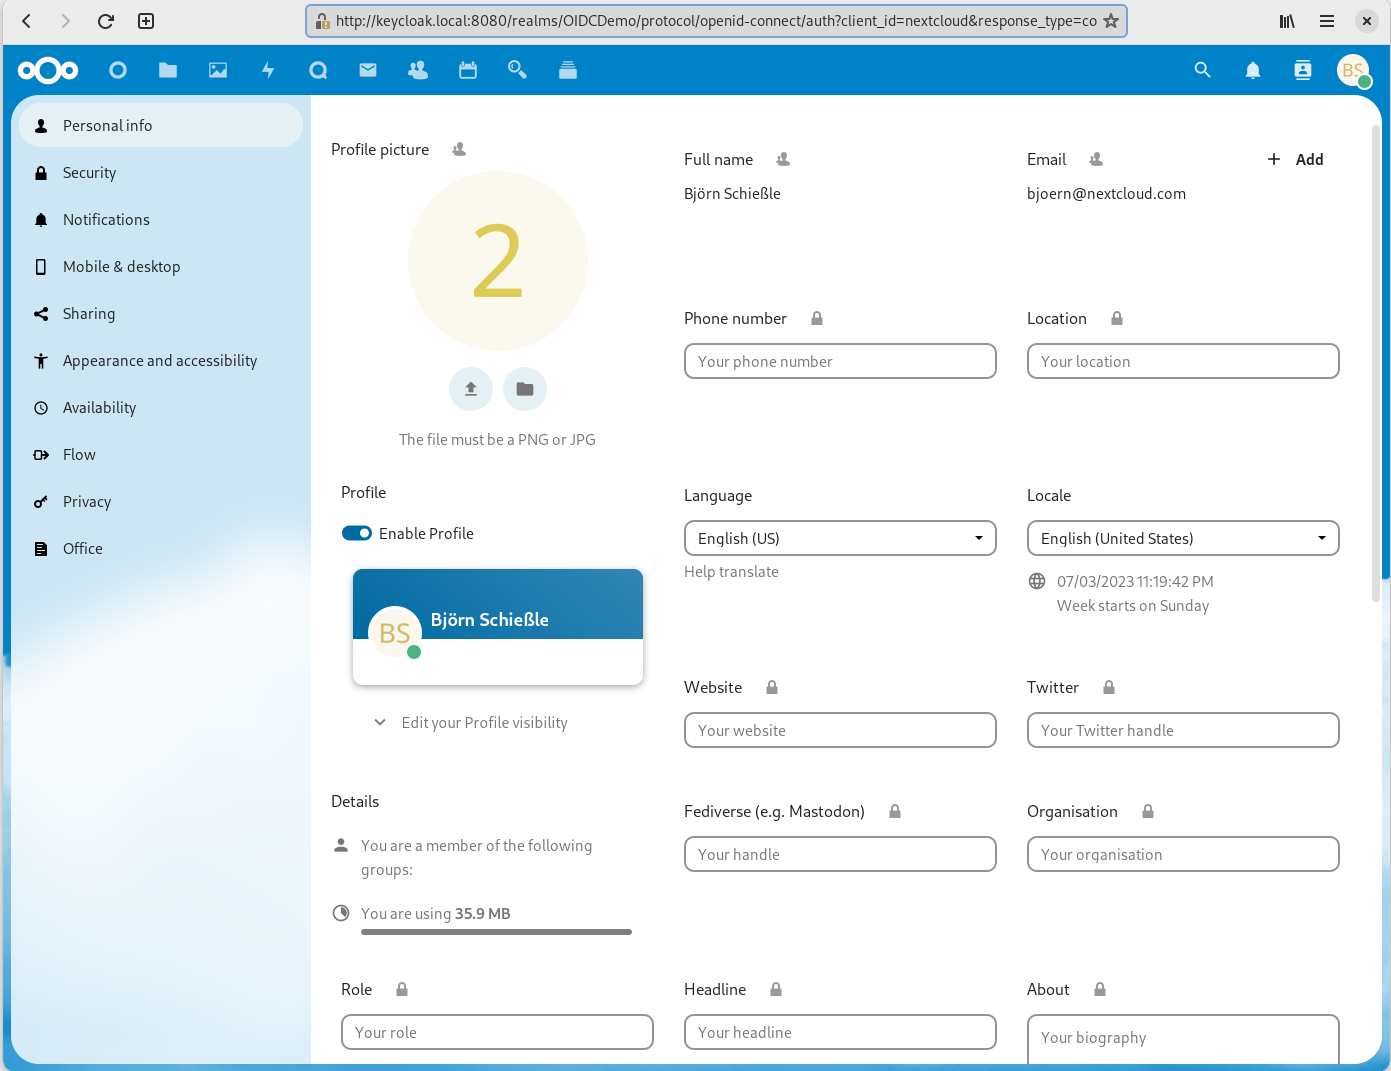
After we successfully logged-in to Keycloak we get directly redirected back to Nextcloud and are logged-in. A look into our personal settings shows us that all our account detail like the full name and the email address where added correctly to our Nextcloud account: